VPS Providers
A Virtual Private Server (VPS) is an isolated environment created on a physical server using virtualization technology. A VPS is fundamentally part of Infrastructure-as-a-Service (IaaS) solutions. This solution offers all the advantages of an ordinary server, with specially allocated resources and complete management freedom. We can freely choose the operating system and applications we want to use, with no configuration restrictions. This VM uses the resources of a physical server and provides users with various server functionalities comparable to those of a dedicated server. It is therefore also referred to as a Virtual Dedicated Server (VDS).
A VPS positions itself as a compromise between inexpensive shared hosting and the usually costly rental of dedicated server technology. This hosting model's idea is to offer users the most comprehensive possible range of functions at manageable prices. The virtual replication of individual computer systems on a standard host system involves significantly less effort for a web hoster than the provision of separate hardware components for each customer. Extensive independence of the individual guest systems is achieved through encapsulation. Each VPS on the shared hardware base acts isolated from other, parallel operating systems. In most cases, VPS is used for the following purposes, but not limited to:
We can choose from a range of Windows and Linux operating systems to provide the required operating environment for our desired application or software during installation.
VPS Setup
Whether we are on an internal or external penetration test, a VPS that we can use is of great importance to us in many different cases. We can store all our resources on it and access them from almost any point with internet access. Apart from the fact that we first have to set up the VPS, we also have to prepare the corresponding folder structure and its services. In this example, we will deal with the provider called Vultr and set up our VPS there. For the other providers, the configuration options look almost identical.
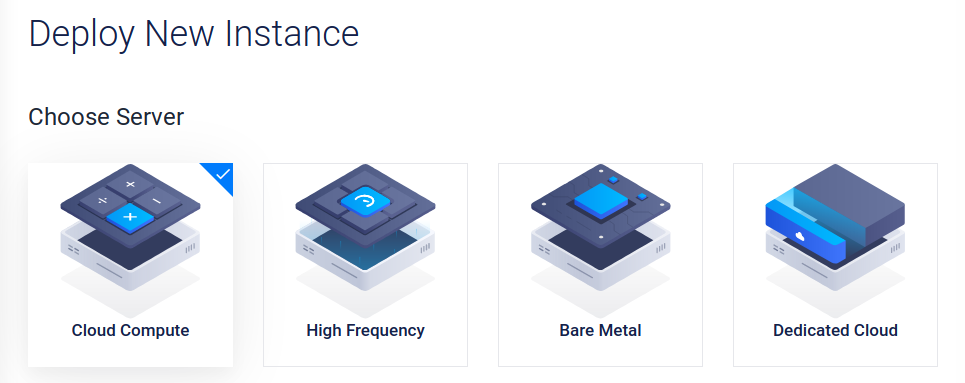
We should still read the individual information about their components carefully and understand what kind of VPS we will be working with in the future. In Vultr, we can choose one of the four different servers. For our purposes, the Cloud Computer server is sufficient for now.
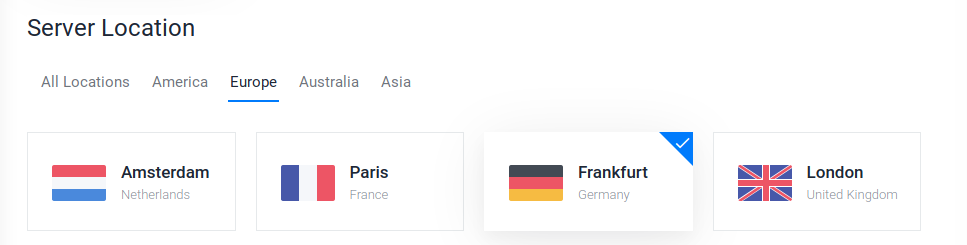
Next, we need to select the location closest to us. This will ensure an excellent connection to our server. If we need to perform a penetration test on another continent, we can also set up a VPS there using our automation scripts and perform the penetration test from there.
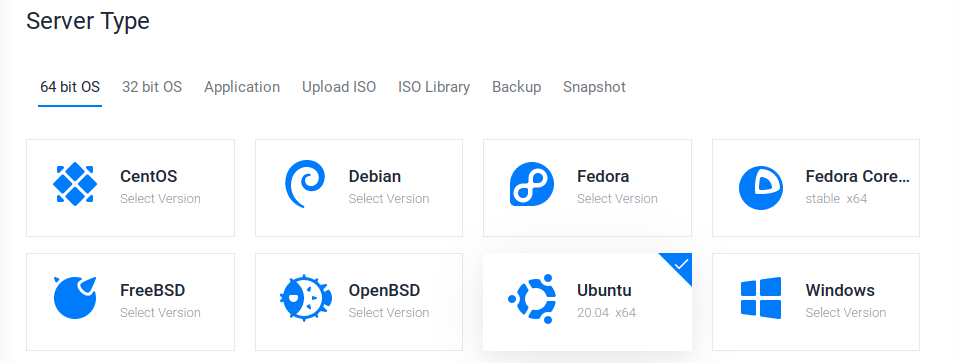
For the server type, we select which operating system should be installed on the VPS. ParrotOS is based on Debian, just like Ubuntu. Here we can choose one of these two or go to advanced options and upload our ISO.
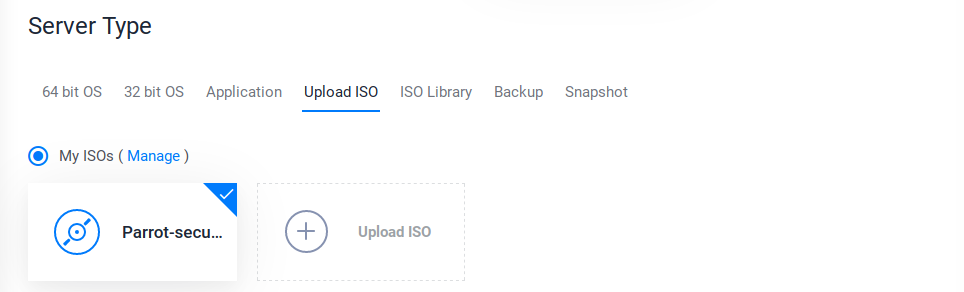
If we want to upload our ISO, we have to do it via a public link to that ISO. We can go to the ParrotOS website, copy the link to the mirror server for the appropriate version, and paste it into Vultr.
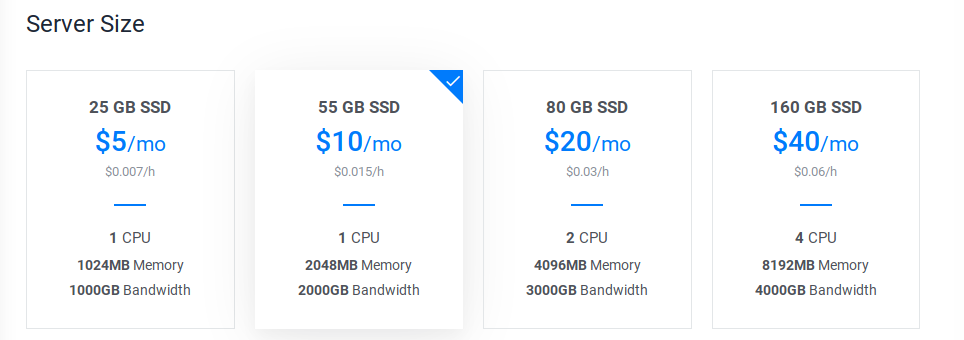
Next, we need to choose the performance level for our VPS. This is one of the points where the cost can change a lot. For our purposes, however, we can choose one of the two options on the left. However, here we need to select the performance for which we want to use the VPS. If the VPS is to be used for advanced purposes and provides many requests and services, 1024MB memory will not be enough. Therefore, it is always advisable to first set up the installation of our OS locally in a VM and then check the services' load.
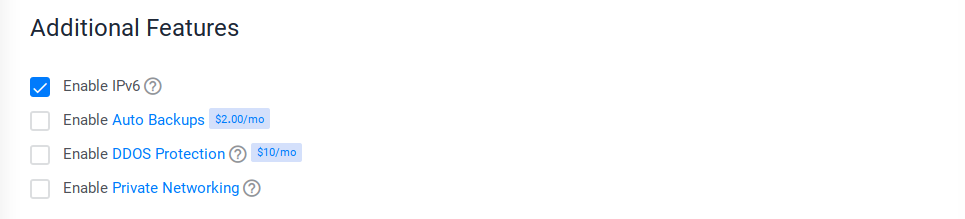
Next, we have the choice if we want to use IPv6 for our VPS. This is highly recommended because many firewalls are only protected against IPv4, and IPv6 is forgotten. We can also allow automatic backups, private networking, and DDOS protection, but at a higher cost.
After that, we can generate our SSH keys, which we can use to log in to the VPS via SSH later. We can also generate these keys later on our VPS or our VM or own host operating system. Let's use our VM to generate the key pair.
Generate SSH Keys
VPS Setup
┌─[cry0l1t3@parrot]─[~]
└──╼$ ssh-keygen -t rsa -b 4096 -f vps-sshGenerating public/private rsa key pair.
Enter passphrase (empty for no passphrase): ******************
Enter same passphrase again: ******************
Your identification has been saved in vps-ssh
Your public key has been saved in vps-ssh.pub
The key fingerprint is:
SHA256:zXyVAWK00000000000000000000VS4a/f0000+ag cry0l1t3@parrot
The key's randomart image is:
...SNIP...
With the command shown above, we generate two different keys. The vps-ssh is the private key and must not be shared anywhere or with anyone. The second vps-ssh.pub is the public key which we can now insert in the Vultr control panel.
SSH Keys
VPS Setup
┌─[cry0l1t3@parrot]─[~]
└──╼$ ls -l vps*-rw------- 1 cry0l1t3 cry0l1t3 3434 Mar 30 12:23 vps-ssh
-rw-r--r-- 1 cry0l1t3 cry0l1t3  741 Mar 30 12:23 vps-ssh.pub

Finally, we choose a hostname and the server label with which we want to name our VPS.

Once the VPS is installed, we can access it via SSH.
SSH Using Password
VPS Setup
sasorirose@htb[/htb]$ ssh root@

root@'s password:

[root@VPS ~]#
After that, we should add a new user for the VPS to not run our services with root or administrator privileges. For this, we can then generate another SSH key and insert it for this user.
Adding a New Sudo User
VPS Setup
[root@VPS ~]# adduser cry0l1t3[root@VPS ~]# usermod -aG sudo cry0l1t3[root@VPS ~]# su - cry0l1t3Password:

[cry0l1t3@VPS ~]$
Adding Public SSH Key to VPS
VPS Setup
[cry0l1t3@VPS ~]$ mkdir ~/.ssh[cry0l1t3@VPS ~]$ echo '' > ~/.ssh/authorized_keys[cry0l1t3@VPS ~]$ chmod 600 ~/.ssh/authorized_keys Once we have added this to the authorized_keys file, we can use the private key to log in to the system via SSH.
Using SSH Keys
VPS Setup
sasorirose@htb[/htb]$ ssh cry0l1t3@ -i vps-ssh

[cry0l1t3@VPS ~]$
VPS Hardening
Another necessary step in our configuration and setup of our VPS is the hardening of the system and access. We should limit our access to the VPS to SSH and disable all other services on the VPS. Finally, we will reduce the attack vectors to a minimum and provide only one possible access to our VPS, which we will secure in the best possible way. We should keep in mind that, if possible, we should not store any sensitive data on the VPS, or at least only for a short period when we perform an internal penetration test. In doing so, we should follow the principle that someone could gain access to the system sooner or later.
However, since in this case, the VPS is only used as a source for our organization and tools and we can access these resources via SSH, we should secure and harden the SSH server accordingly so that no one else (or at least no one other than the team members) can access it. There are many ways to harden it, and this includes the following precautions, but not limited to:
- Install Fail2ban
- Working only with SSH keys
- Reduce Idle timeout interval
- Disable passwords
- Disable x11 forwarding
- Use a different port
- Limit users' SSH access
- Disable root logins
- Use SSH proto 2
- Enable 2FA Authentication for SSH
It is highly recommended to try these settings and precautions first in a local VM we have created before making these settings on a VPS.
One of the first steps in hardening our system is updating and bringing the system up-to-date. We can do this with the following commands:
Update the System
VPS Hardening
[cry0l1t3@VPS ~]$ sudo apt update -y && sudo apt full-upgrade -y && sudo apt autoremove -y && sudo apt autoclean -ySSH Hardening
SSH is always installed on the VPS, giving us guaranteed access to the server in advance. Now we can change some of the settings in the configuration file /etc/ssh/sshd_config to enforce these security measures for our SSH server. In this file, we will comment out, change or add some lines. The entire list of possible settings that can be made for the SSH daemon can be found on the man page.
Install Fail2Ban
VPS Hardening
[cry0l1t3@VPS ~]$ sudo apt install fail2ban -yOnce we have installed it, we can find the configuration file at /etc/fail2ban/jail.conf. We should make a backup if we make a mistake somewhere and it does not work as it should.
Fail2Ban Config Backup
VPS Hardening
[cry0l1t3@VPS ~]$ sudo cp /etc/fail2ban/jail.conf /etc/fail2ban/jail.conf.bakIn this file, we will find the field commented out with # [sshd]. In most cases, we will find the first line commented out there. Otherwise, we add this and two more, as shown in the following example:
/etc/fail2ban/jail.conf
VPS Hardening
...SNIP...

# [sshd]enabled = true
bantime = 4w
maxretry = 3
With this, we enable monitoring for the SSH server, set the ban time to four weeks, and allow a maximum of 3 attempts. The advantage of this is that once we have configured our 2FA feature for SSH, fail2ban will ban the IP address that has entered the verification code incorrectly three times too. We should make the following configurations in the /etc/ssh/sshd_config file:
Editing OpenSSH Config
VPS Hardening
[cry0l1t3@VPS ~]$ sudo cp /etc/ssh/sshd_config /etc/ssh/sshd_config.bak[cry0l1t3@VPS ~]$ sudo vim /etc/ssh/sshd_config2FA Authentication
With the configuration shown above, we have already taken essential steps to harden our SSH. Therefore, we can now go one step further and configure 2-factor authentication (2FA). With this, we use a third-party software called Google Authenticator, which generates a six-digit code every 30 seconds that is needed to authenticate our identity. These six-digit codes represent a so-called One-Time-Password (OTP). 2FA has proven itself an authentication method, not least because of its relatively high-security standard compared to the time required for implementation. Two different and independent authentication factors verify the identity of a person requesting access. We can find more information about 2FA here.
We will use Google Authenticator as our authentication application on our Android or iOS smartphone. For this, we need to download and install the application from the Google/Apple Store. A guide on setting up Google Authenticator on our smartphone can be found here. To configure 2FA with Google Authenticator on our VPS, we need the Google-Authenticator PAM module. We can then install it and execute it to start configuring it as follows:
Installing Google-Authenticator PAM Module
VPS Hardening
[cry0l1t3@VPS ~]$ sudo apt install libpam-google-authenticator -y[cry0l1t3@VPS ~]$ google-authenticatorDo you want authentication tokens to be time-based (y/n) y

Warning: pasting the following URL into your browser exposes the OTP secret to Google:
  https://www.google.com/chart?chs=200x200&chld=M|0&cht=qr&chl=otpauth://totp/cry0l1t3@parrot%3Fsecret%...SNIP...%26issuer%3Dparrot

   [ ---- QR Code ---- ]

Your new secret key is: ***************
Enter code from app (-1 to skip):
If we follow these steps, then a QR code and a secret key will appear in our terminal, which we can then scan with the Google Authenticator app or enter the secret key there. Once we have scanned the QR code or entered the secret key, we will see the first OTP (six-digit number) on our smartphone. We enter this in our terminal to synchronize and authorize Google Authenticator on our smartphone and our VPS with Google.
The module will then generate several emergency scratch codes (backup codes), which we should save safely. These will be used in case we lose our smartphone. Should this happen, we can then log in with the backup codes.
Google-Authenticator Configuration
VPS Hardening
Enter code from app (-1 to skip):

Code confirmed
Your emergency scratch codes are:
  21323478
  43822347
  60232018
  73234726
  45456791

Do you want me to update your "/home/cry0l1t3/.google_authenticator" file? (y/n) y

Do you want to disallow multiple uses of the same authentication
token? This restricts you to one login about every 30s, but it increases
your chances to notice or even prevent man-in-the-middle attacks (y/n) y

By default, a new token is generated every 30 seconds by the mobile app.
In order to compensate for possible time-skew between the client and the server,
we allow an extra token before and after the current time. This allows for a
time skew of up to 30 seconds between authentication server and client. If you
experience problems with poor time synchronization, you can increase the window
from its default size of 3 permitted codes (one previous code, the current
code, the next code) to 17 permitted codes (the 8 previous codes, the current
code, and the 8 next codes). This will permit for a time skew of up to 4 minutes
between client and server.
Do you want to do so? (y/n) n

If the computer that you are logging into isn't hardened against brute-force
login attempts, you can enable rate-limiting for the authentication module.
By default, this limits attackers to no more than 3 login attempts every 30s.
Do you want to enable rate-limiting? (y/n) y
Next, we need to configure the PAM module for the SSH daemon. To do this, we first create a backup of the file and open the file with a text editor such as Vim.